Root inspection window pot.
A 112 mm wide drained pot with a pointed root-view opening, a channel for bought clear PET sheet, an independently removable opaque shutter, and a raised-support saucer.
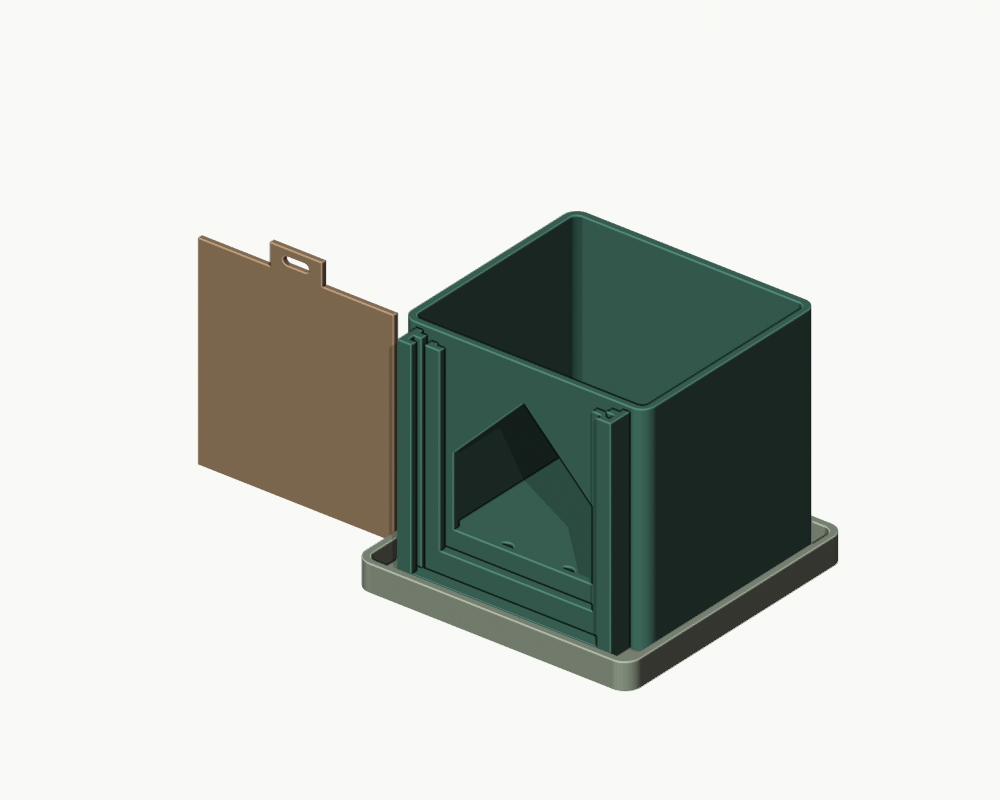
INTERACTIVE 3D PREVIEW
See it from every angle.
Loading 3D preview…
Drag to rotate · Scroll to zoomPLANT WORKSHOP / PROTOTYPE
Make and assemble.
All dimensions are in millimeters. These designs have passed digital mesh checks but have not been physically printed or tested. Check fit, water resistance, and load capacity for your setup.
Parts to print
- pot × 1112 x 111.2 x 100 mm including forward channels. Print upright; the pointed window uses 45-degree slopes.
- shutter × 190 x 104 x 2.4 mm including pull tab. Print broad face flat; rotate upright to slide into outer rails.
- saucer × 1126 x 126 x 12 mm. Print bottom down. Four 3 mm supports keep the pot drains above the saucer floor.
Additional components
- 1 clear PET sheet cut to 76 mm wide x 80 mm high x 0.5-0.8 mm thick; not supplied. Round or deburr cut edges.
- Optional removable water-resistant tape to secure the lower sheet perimeter if fine soil escapes; the slot is not a gasketed seal.
Assembly
- Dry-fit the bought PET sheet into the inner channels, nearest the pot wall. The sheet drops in from above, stops at Z=12 mm, and ends at Z=92 mm.
- The inner channel has 78 mm between side posts and a 1.2 mm front/back gap. Check the sheet lies flat and overlaps the entire pointed opening.
- Insert the opaque shutter into the separate outer channels. Its 90 mm panel slides in the 92 mm width and 2.8 mm thickness clearance; the pull tab remains accessible above the pot.
- Set the pot on the four saucer support pads, with the front channels inside the saucer. Center its full footprint, which places the pot body center about 5.6 mm behind the saucer center.
- Add potting medium only after confirming the clear sheet stays seated. Inspect the drain holes and remove the shutter briefly to view roots; slide it back after viewing.
- Empty runoff rather than letting it rise to the pot floor. Remove the sheet and shutter for cleaning after emptying the pot.
Print notes
- Prototype starting point: PETG, 0.4 mm nozzle, 0.20 mm layers, 4 walls, 5 bottom/top layers, 15-25% infill.
- Pot upright, saucer upright, shutter flat. No supports are intended; inspect the 45-degree window edges and channel openings in the slicer.
- The clear window is purchased sheet material. An opaque printed shutter is not a transparent window.
- Remove strings and first-layer flare from the channels before testing the sheet and shutter.
Limitations
- PROTOTYPE / NOT PHYSICALLY TESTED. Check drainage, slide fit, sheet retention and seepage before use.
- The window slot retains soil but is not a watertight seal. The pot has six intentional 6 mm drainage holes.
- Use opaque filament for the shutter. Root visibility depends on growth reaching the window.
- The saucer has only a small runoff capacity and has not been leak-tested.