Self-watering conversion insert.
A 160 mm perforated deck with four 40 mm supports, wick basket, refill tube, and protected float indicator for a separate straight-sided reservoir.
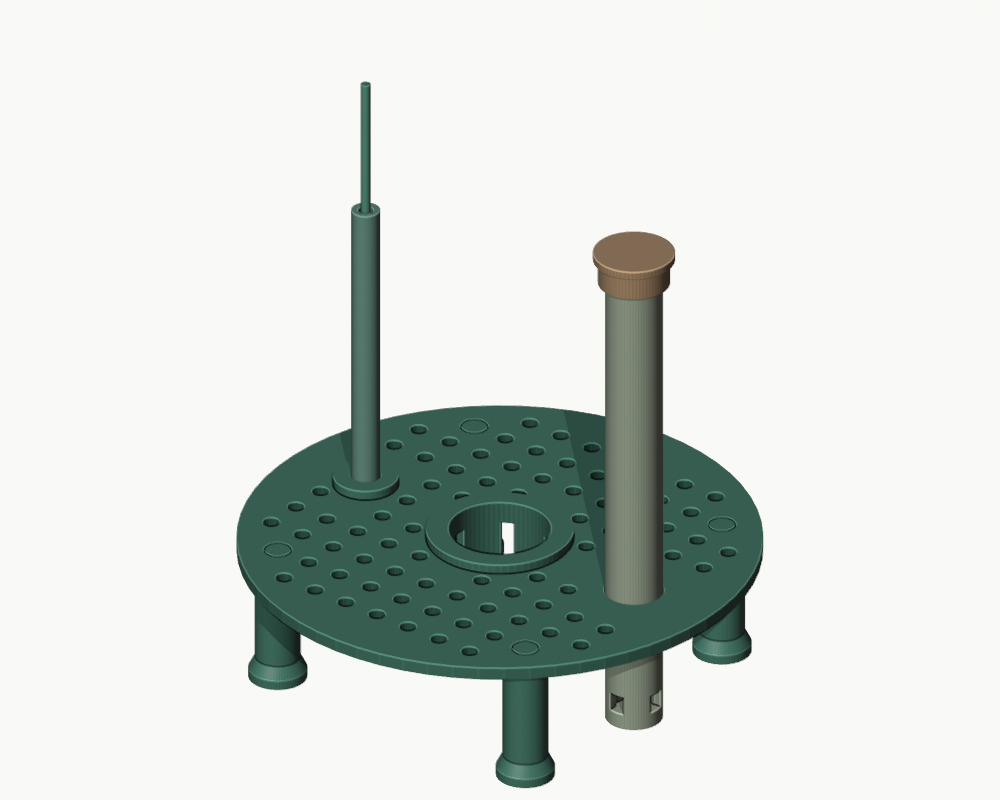
INTERACTIVE 3D PREVIEW
See it from every angle.
Loading 3D preview…
Drag to rotate · Scroll to zoomPLANT WORKSHOP / PROTOTYPE
Make and assemble.
All dimensions are in millimeters. These designs have passed digital mesh checks but have not been physically printed or tested. Check fit, water resistance, and load capacity for your setup.
Parts to print
- deck × 1160 x 160 x 4 mm. Print flat. Mesh liner required to retain fine soil.
- leg × 418 x 18 x 44 mm. Print foot down. 8 mm peg seats in an 8.5 mm deck hole.
- wick basket × 145 x 45 x 41 mm. Print bottom down; support the outer flange only.
- refill tube × 117.6 x 17.6 x 160 mm. Print closed foot down with brim. Four low side outlets.
- refill cap × 125 x 25 x 10.4 mm. Print closed face down; invert for use.
- float guide × 120 x 20 x 7 mm. Print flange down; invert and insert the peg into the deck.
- float tube × 18.8 x 8.8 x 100 mm. Print vertically with brim; bond into the guide with the lower end flush to its peg.
Additional components
- 1 watertight straight-sided outer reservoir: at least 166 mm internal diameter at the deck and at least 160 mm tall; flat base; not supplied.
- 1 length of approximately 6 mm absorbent wick, about 180 mm long; trim to fit.
- 1 soil-retaining mesh liner approximately 190 mm diameter, trimmed and turned up the container wall to cover both deck holes and the perimeter clearance; cut snug openings around the basket and tubes.
- 1 bought buoyant cork or closed-cell foam float, nominal 20 mm diameter x 15 mm high.
- 1 straight 3 mm diameter x 160 mm indicator rod/skewer.
- Small amount of suitable water-resistant adhesive for rod-to-float and tube-to-guide joints.
Assembly
- Test the outer container and printed interfaces dry before adding soil. Verify all four 18 mm feet sit flat and the 160 mm deck clears the wall.
- Insert four leg pegs through the deck from below. The deck underside sits 40 mm above the reservoir base and its top is at 44 mm.
- Put the wick through the basket bottom, leaving a tail to touch the reservoir floor, and seat the basket flange on top of the deck.
- Stand the refill tube on the reservoir floor through its 18.2 mm deck hole. Check all four low outlets are unobstructed.
- Invert the float-guide seat into the 12.2 mm deck hole. Bond the float tube in its 9.2 mm bore, with the tube lower end flush to the seat peg; the tube runs from Z=40 to Z=140 in the assembled unit. Keep glue out of the 4.6 mm rod bore.
- Bond the bought 3 mm rod into the bought float, thread it upward through the tube, and verify free movement through the full reservoir range. The float remains below the deck.
- Fit the mesh liner across the deck and its outer perimeter gap, turning the excess upward against the reservoir wall so soil cannot bypass the deck edge. Moisten the wick before filling soil. Keep soil below Z=130 mm so it cannot enter the top of the float tube.
- Calibrate empty and full marks on the visible rod using the actual float. Limit water to 25 mm above the reservoir floor, leaving 15 mm air space below the deck; use a compatible overflow or a manual fill limit.
- Fit the refill cap and verify water delivery and unobstructed float travel before leaving any plant in the insert.
Print notes
- Prototype starting point: PETG, 0.4 mm nozzle, 0.20 mm layers, 4 walls, 5 bottom/top layers, 20-30% infill. Tune to your filament.
- The STL files are in millimeters and already in their intended print orientations.
- Use a brim for the narrow tall refill and float tubes. Support only the underside of the basket flange; remove support completely.
- Print the small guide and one leg first to check your fit clearances. Do not use uniform scaling to correct only a hole fit.
Limitations
- PROTOTYPE / NOT PHYSICALLY TESTED. No load, leak, or watering-performance rating.
- The separate container must supply water containment; the printed deck is intentionally perforated.
- Float buoyancy, wick delivery, and soil contact must be verified with the actual bought materials.
- The default is a small straight-sided reservoir insert, not a universal fit for tapered pots. Changing only deck diameter will not reposition the feet or tube holes.
- The preview includes visual proxies for the bought rod and float; those are not printable parts.