Modular propagation station.
Six removable rooting cups in a shallow refillable tray, with an optional clear-film cover frame.
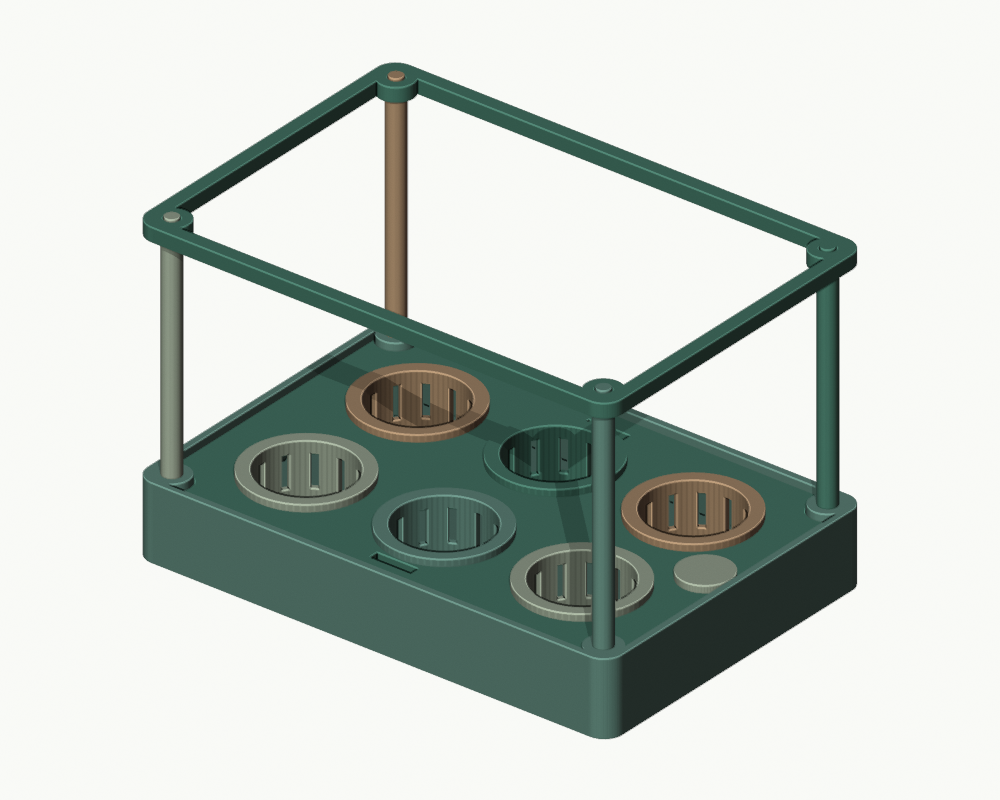
INTERACTIVE 3D PREVIEW
See it from every angle.
Loading 3D preview…
Drag to rotate · Scroll to zoomPLANT WORKSHOP / PROTOTYPE
Make and assemble.
All dimensions are in millimeters. These designs have passed digital mesh checks but have not been physically printed or tested. Check fit, water resistance, and load capacity for your setup.
Parts to print
- tray × 1210 x 144 x 32 mm; open face upward; holds the raft on an internal shelf.
- raft × 1203.2 x 137.2 x 4 mm; flat face down; six bevelled cup seats and a refill hole.
- cup × 650 mm maximum diameter, 25 mm high; perforated shallow rooting basket; upright.
- fill cap × 122 mm diameter; print broad face on bed, turn over to insert.
- cover post × 4Optional cover: 110 mm high, 8 mm main diameter; vertical with a brim or laid flat with supports.
- cover frame × 1Optional cover: 210 x 144 x 6 mm; flat on bed.
Additional components
- Optional: one sheet of clean clear horticultural film, about 500 x 450 mm, trimmed to suit; clip or tape to the cover frame without sealing all ventilation.
- Optional: six rooting plugs sized to the 39 mm cup opening; supports or cuttings chosen for the plant.
Assembly
- Place the tray on a level, washable surface and check its floor and seams with plain water.
- Drop the raft onto the shelf at z=25 mm, with the cup-seat bevels upward. The corner notches fit around the tray socket bosses.
- Insert six cups. Their 44 mm bodies fit the 44.8 mm holes; matching bevels support their 50 mm rims at the raft surface.
- Add water through the 16 mm refill hole. With the cups installed, their bottoms are at z=7 mm and the tray floor at z=3 mm. Start shallow and adjust water depth to the plant and rooting medium.
- Turn the fill cap over and place its 15.4 mm stem into the refill hole. It is a loose cap, not a seal.
- Optional: insert four cover posts into the tray sockets until their shoulders rest on the tray top. Put the cover frame onto the upper pins. Add bought clear film and leave vents; the printed frame itself is not transparent.
Print notes
- All parts are millimetres. Trial settings: 0.20 mm layer height, four perimeters, five or six solid bottom layers and 20-30% infill. Adjust to your filament and slicer.
- PETG is a starting material for a room-temperature wet prototype; do not assume any printed surface is leakproof or sanitary.
- Tray, raft, cups, cap and frame are exported in their intended orientation. Cups have bevelled rims to reduce unsupported overhangs. Inspect the socket shelf in the slicer.
- Cover posts are optional and slender. Print individually with a 5-8 mm brim and slow outer walls; alternatively lay them flat and support the pins, then remove and smooth supports.
- Dry-fit one cup and one cover post first. Do not force pins or scale all assembled parts indiscriminately.
Limitations
- PROTOTYPE / NOT PHYSICALLY TESTED. Clearances, wet durability and actual print settings need confirmation.
- This is a shallow passive propagation tray, not an aeroponic cloner. No pump, heater, transparent cover or plant material is included.
- Six cups are 39 mm inside diameter and approximately 20 mm deep below their rims. Larger rooting plugs require an edited raft and cup together.
- The cover has no hinge or rigid transparent panels. Film and attachment method are external supplies.